
Last updated November 18, 2026
Radiant Barrier Installation Troubleshooting: Common Problems and How to Fix Them
If you installed a radiant barrier two summers ago and your cooling bills haven’t moved, the barrier probably isn’t broken. It’s most likely bridging, dusty, or was installed on the wrong surface for your attic configuration. That’s the part nobody warns you about: nearly every radiant barrier failure we diagnose in Paradise is invisible from the attic stairs. The foil looks fine. It’s shiny. It’s stapled up there. And it’s doing almost nothing. In this guide, we’ll walk through the three installation errors that cause most underperformance, explain how dust quietly kills emissivity, and show you how to tell a barrier problem from a duct leak before you spend a dime. Paradise homeowners deserve a straight answer, so let’s get into it.
Quick Answer
Most radiant barrier problems come down to three installation errors: a lost air gap (foil touching the decking or rafters), foil facing the wrong direction so it can’t reflect heat back into the attic, and sloppy staple patterns that let the barrier sag until it contacts the roof. Diagnose underperformance in this order: check the air gap, check the foil orientation, check for dust, check attic ventilation, then test for duct leakage. If more than a small section is compromised, replacement usually beats patching.
The barrier itself rarely fails. The install does. Once you know what to look for, the answer is usually obvious in under fifteen minutes with a flashlight and a ladder.
Table of Contents
- Why the Air Gap Is the Whole Ballgame
- Wrong-Side Foil Orientation: The Silent Killer
- Staple Patterns, Sag, and Decking Contact
- Dust, Emissivity, and the Flashlight Test
- Inadequate Ventilation: Fix vs. Reinstall
- Barrier Problem or Duct Leak? How to Tell
- Repair vs. Replace: The Honest Threshold
Why the Air Gap Is the Whole Ballgame
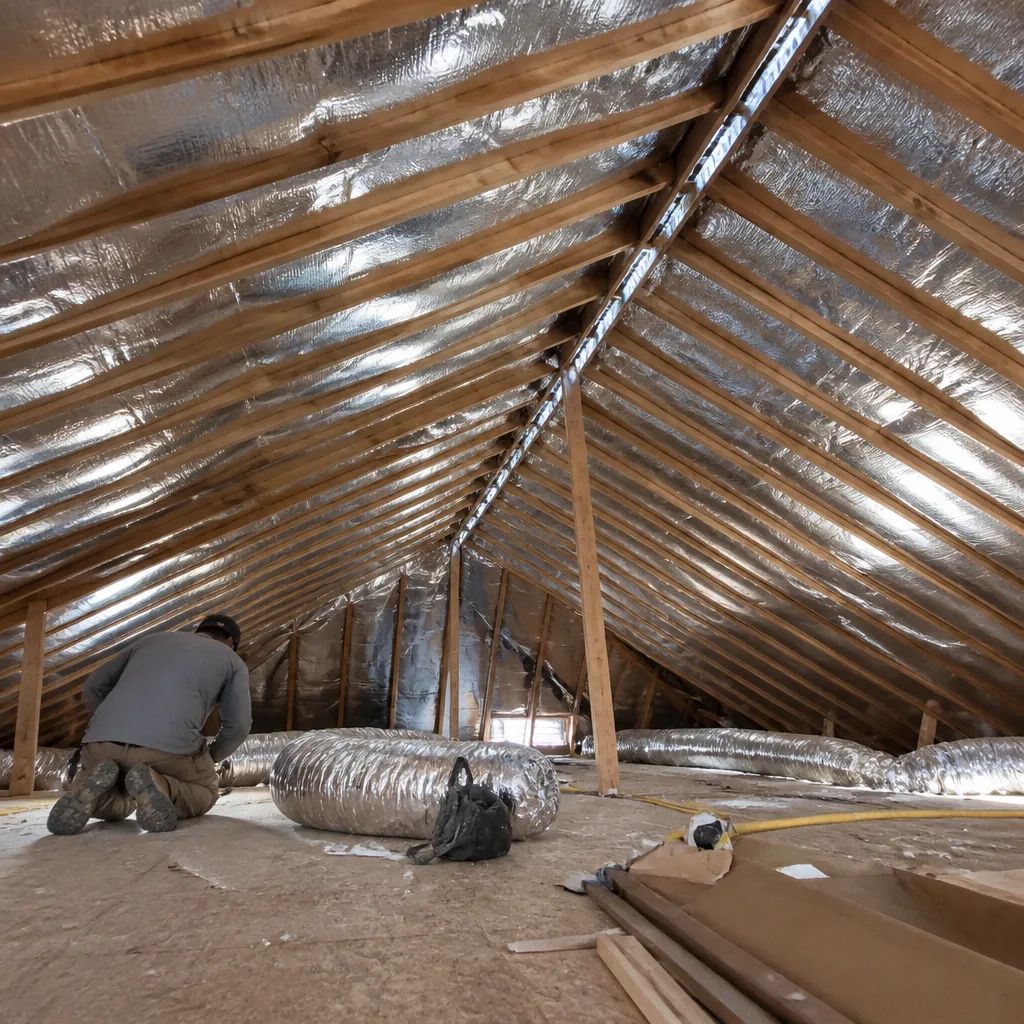
Radiant barrier foil works by reflecting radiant heat, and reflection requires separation. A radiant barrier with a proper air gap on at least one side can block upward of 90% of radiant heat transfer from the roof. The same foil pressed flat against the decking performs more like a slightly warm sheet of cardboard. That’s not an exaggeration – the air gap is the entire mechanism, and it’s the first thing that fails in a hot climate like ours.
Here in Paradise, attic deck temperatures push well past 150°F on July afternoons. Foil sagging against the roof sheathing becomes a conduction path. Heat moves straight from the shingles into the foil, into the attic air, and down through your ceiling. The homeowner sees a barrier up there and assumes it’s working. It isn’t.
How to check the air gap:
- Get in the attic with a bright flashlight in the middle of the day.
- Sight along the underside of the roof decking. Look for any place the foil is kissing the wood.
- Check the low spots first – rafters with longer spans sag more, especially on the sunny side of the roof.
- Note where the gap closes down to a quarter inch or less. Those are the trouble spots.
If the foil touches the decking across more than a small area, the barrier isn’t functioning. Ten or fifteen square feet of contact is a patch job. Half the roof is a reinstall. We see this a lot in Paradise homes built during the 2000s building boom, where fast installs left the foil over-tensioned and it sagged once the attic heat got to it.
Wrong-Side Foil Orientation: The Silent Killer
Radiant barrier foil is directional in a way most people don’t expect. The shiny reflective surface does the work, and depending on the product, it needs to face the open attic space – not the roof decking. Flip it backward and you’ve essentially installed a $1,200 sheet of housewrap.
Single-sided foil has one reflective face and one non-reflective face. The reflective face should point down toward the attic floor (or up toward the roof, depending on the installation method). Double-sided foil is more forgiving because both sides reflect, but a double-sided product installed directly against the decking loses its air gap regardless of orientation.
We’ve seen this error in a lot of Paradise homes where the barrier was added by a handyman or a previous owner. It’s not a scam – it’s just that the foil looks the same from either side once it’s stapled up, and if you don’t know to check, you don’t check.
How to tell:
- Look at the foil edge where it overlaps the next run. The reflective side shows as a mirror finish. The back side is typically duller, sometimes has a printed manufacturer name, and may be perforated.
- If the reflective side is facing the decking and the dull side is facing the attic, the install is wrong for a single-sided product.
- If you’re not sure, check the brand label on a visible edge. Owens Corning and Johns Manville both print orientation guidance right on the foil.
The good news is orientation is a correctable problem, not a fatal one. Pulling and re-stapling the affected runs is a real fix, not a sales pitch.
Staple Patterns, Sag, and Decking Contact
Staples are the least glamorous part of radiant barrier work and the most common failure point. A barrier stapled with too few fasteners, or stapled at the wrong spacing, will sag once the attic heat cycles it a few thousand times. Sag leads to contact with the decking. Contact kills the air gap. The whole system collapses into a slightly reflective blanket that does almost nothing.
Correct staple spacing for most foil products runs about 8 to 12 inches along the long edges and every 12 to 24 inches across the interior. Fewer than that and the foil will sag within a couple of summers. It’s a slow failure – the barrier looks fine at month three and starts touching the decking at month thirty.
What a proper staple pattern looks like:
- Fasteners set along the rafters or truss chords, not between them.
- Edges overlapped by at least 2 inches and stapled through the overlap.
- No visible gaps between runs where hot attic air can climb past.
- Foil pulled snug but not drum-tight – tight foil sags worse than slightly loose foil.
If you’re looking at a barrier installed by a previous owner and the staples are sparse, the honest fix is to add fasteners in the sagging zones. Not a full reinstall. Just fix what’s broken. If the foil has already torn along the staple line, that tells you the install was too tight and the whole run wants replacing. We see that pattern plenty in Paradise attics with sharp roof pitches.
Dust, Emissivity, and the Flashlight Test
Radiant barrier performance depends on the foil staying clean and reflective. Dust, attic debris, and rodent activity all degrade emissivity, which is the measure of how much radiant heat the foil can bounce back. A fresh foil starts near 95% reflectivity. A dusty foil in a Paradise attic can drop into the 60s, which means it’s reflecting roughly two-thirds of the heat it was supposed to reflect. That’s the difference between a working barrier and an expensive shiny thing stapled to your rafters.
The good news: you can test for dust degradation without a reflectometer or any expensive equipment.
The flashlight test:
- Go into the attic mid-day with a strong flashlight.
- Shine it at the foil from about three feet away.
- Look at the reflection. A clean foil returns a sharp, bright spot. A dusty foil returns a dull, spread-out glow.
- Wipe a small area with a clean white cloth. If the cloth comes away gray or brown, dust is your problem.
To be clear: dust doesn’t mean the foil is ruined. It means it needs cleaning, and cleaning foil is a real service. A gentle wash and dry restores most foil to within a few points of original reflectivity. We handle this as part of our Walt’s Insulation Paradise home service offering when a homeowner calls after a failed DIY check. If a barrier is more than a decade old and dust has embedded into the foil finish itself, cleaning won’t help – the foil is spent and replacement is the honest recommendation.
One thing to watch for: rodent droppings, nesting material, and contaminated insulation on top of the foil. That’s a safety issue, not just a performance issue. If you find that, stop and call a professional.
Inadequate Ventilation: Fix vs. Reinstall
Radiant barrier installed in an attic with poor ventilation is a barrier working against the deck. The foil reflects heat, but without ventilation to move that heat out of the attic, the foil surface heats up, hot air stratifies at the ridge, and the whole assembly loses effectiveness. Barrier plus ventilation is the combination. Barrier without ventilation rarely delivers the utility-bill relief the homeowner was promised.
We run into this constantly in Paradise, where soffit vents may be blocked by insulation, ridge vents may be undersized, or the original builder simply skipped one or the other. Before you consider replacing a barrier, ask the hard question: does this attic have adequate net free ventilation area?
The specific fix vs. full reinstall decision:
- Ventilation alone is the problem: Fix ventilation, keep the barrier. Adding or clearing soffit vents, installing ridge vents, or resolving blocked baffles costs a fraction of a reinstall.
- Barrier is correct but ventilation is also wrong: Fix both. Barrier reinstalled over a properly vented attic will perform as designed.
- Barrier is compromised AND ventilation is wrong: Expect a full reinstall with ventilation as part of the scope. Half-fixing either one leaves performance on the table.
This is where most troubleshooting stalls. Homeowners want the barrier to be the problem, but often it’s a venting problem wearing a barrier problem’s clothes. A home energy audit is the fastest way to sort it out. Our attic insulation in Paradise service includes the ventilation check as a standard step before we recommend anything.
Barrier Problem or Duct Leak? How to Tell
Here’s the diagnosis we walk through the most: barrier issues and duct leaks look almost identical on the utility bill. Both show up as a second-story room that won’t cool, a system that runs all afternoon, or a cooling bill that creeps up 15 to 25% over two summers. And the two problems masquerade for each other because a barrier that’s working well makes a duct leak worse by trapping more cool air in an under-vented attic.
How to isolate the problem:
- Seal the ducts first, mentally. In most Paradise attics, an unsealed duct system loses 20 to 30% of cooling before it reaches the register. If you haven’t ruled that out, you can’t diagnose the barrier.
- Feel the register closest to the air handler vs. the furthest. More than a 10-degree gap points to duct leakage or duct insulation failure.
- Look at the duct runs themselves. Any visibly disconnected joints, tears in the jacket, or ductwork lying on top of the barrier are red flags.
- Only after ducts are ruled out (or fixed) does it make sense to troubleshoot the barrier performance problem.
Duct leakage is cheap to test and cheap to fix by comparison. Barrier problems are more expensive. Doing the diagnostic in the wrong order wastes real money. If a homeowner calls us certain the barrier is the issue, our first question isn’t “let’s replace the barrier” – it’s “what does your duct system look like?”
Repair vs. Replace: The Honest Threshold
Nobody wants to hear “you need to start over,” so here’s the honest threshold we use. If the barrier is 80% or more intact – air gap holding, foil clean, staples tight, orientation correct – repair makes sense. Patch the compromised run, add fasteners where it’s sagging, clean the dusty sections. You’ll get most of the performance back for a fraction of the cost of a reinstall.
If the barrier is under 70% intact, replacement is the more honest answer. Compromised foil is compromised foil, and you’ll be chasing failures from one end of the roof to the other for the next decade. If it’s between 70 and 80%, that’s a judgment call based on the age of the foil, how many runs are affected, and whether the underlying ventilation is correct.
Where the barrier sits on that spectrum:
- 75%+ intact: repair. Patch the bad runs, clean the dust, correct any staple issues.
- 70-75% intact: judgment call. Repair is fine if the barrier is under 10 years old and the ventilation is sound.
- Under 70% intact: replace. A compromised barrier that’s been sagging for years will keep failing, and patching is throwing money at a dying system.
Paradise homes with barrier installed on top of an already-failing crawl space encapsulation and vapor barrier system sometimes present the reverse issue: moisture from below is degrading the foil from the back. That’s a replace-or-fix-the-moisture problem, and the barrier isn’t the real culprit. Fix the moisture first.
Common Mistakes to Avoid
- Installing foil flat against the decking to save time. This defeats the entire mechanism. The air gap isn’t optional. Homeowners in the Paradise foothills especially see this – foil tight to the deck gets zero ventilation circulation and no reflective performance.
- Assuming double-sided foil is immune to orientation issues. Double-sided foil can be installed either way, but the air gap still matters. We see plenty of double-sided product installed flush against sheathing in 1990s Paradise homes.
- Adding more staples without checking for sag first. Extra staples in a slack run just make it sag in a different pattern. Pull the run taut first, then staple.
- Replacing the barrier when ducts are the real problem. If 25% of your cooling is leaking into the attic, no barrier will fix it. Rule out ducts first, always.
- Skipping the ventilation check. Barrier plus bad ventilation is a half-solved problem. Fix both or neither.
- Ignoring rodent contamination. Droppings and nesting material on the foil are a health concern, not a performance one, and it has to be addressed before anything else. Our spray foam insulation in Paradise service often includes the cleanup step when contamination is present.
- Assuming dust means replacement. Most dusted foil can be cleaned and restored to near-full reflectivity. Cleaning is far cheaper than a reinstall, and it works.
When to Call a Professional
Call a professional when the diagnosis involves ladders, tight attic spaces, or the possibility you’ll be making things worse. Radiant barrier troubleshooting involves working in 150°F+ attic air, walking tight truss chords, and making an honest call about whether the barrier is worth saving. If you’re not comfortable in an attic in July, that’s not a DIY scenario. Call someone who does it every week.
Specific scenarios that are always worth a call: the barrier looks fine but performance collapsed anyway; you suspect duct leakage but can’t isolate it; ventilation or crawl space moisture is part of the picture; there’s rodent contamination anywhere in the attic; or more than a small section of foil has come loose. Our technicians have up to 26 years of experience diagnosing exactly these cases, and Walt’s Insulation Paradise is a locally owned, owner-operated business with a published address and license number – a real business you can call back, not an 800 number that routes somewhere else. Our team in Paradise answers the phone live, 24/7. Call (844) 978-0556 for a free estimate, no trip charge inside our county, and a free second opinion on any written estimate you’ve already received.
Frequently Asked Questions
Because the barrier probably isn’t working as designed. The three most common causes are a lost air gap (foil sagging against the decking), wrong-side foil orientation, and excessive dust on the foil surface reducing emissivity. Before assuming the barrier is defective, check the air gap, check orientation, and run the flashlight dust test. If all three check out, rule out duct leakage in the attic – duct losses of 20 to 30% are common and can mask any barrier improvement.
It can almost always be cleaned. Dust degrades reflectivity, but a gentle wash and dry restores most foil to within a few points of original emissivity. Replacement is only necessary if the dust has embedded into the foil finish itself, which typically happens after 15+ years of exposure. Call (844) 978-0556 for an inspection – most dusted barriers in Paradise don’t need replacement, they need a cleaning.
It works, but it underperforms. Radiant barrier plus proper attic ventilation is the working combination. Barrier installed in an under-vented attic reflects heat back into the decking and hot air stratifies at the ridge with nowhere to go. The fix is usually ventilation work rather than barrier replacement – adding or clearing soffit vents, installing ridge vents, and resolving blocked baffles is significantly cheaper than a full reinstall.
Test the registers first. A more than 10-degree temperature gap between the register closest to the air handler and the furthest register points to duct leakage, not a barrier issue. Look at the duct runs for disconnected joints or tears in the jacket. If ducts are ruled out or already sealed, then troubleshoot the barrier. This order saves real money because duct fixes are usually cheaper than barrier repairs.
Repair is cheaper when the barrier is 75% or more intact – patch the bad runs, add fasteners, clean the dust, and you’ll recover most performance for a fraction of the cost. Replacement is the honest answer when the barrier is under 70% intact or when multiple failure modes overlap. At 70-75% intact, it’s a judgment call based on foil age and whether ventilation is sound. Call (844) 978-0556 for an honest assessment – we’ll tell you which side of the threshold you’re on, not which one is a bigger ticket.
Four things: shine a flashlight along the underside of the roof decking and look for foil touching the wood; check a visible foil edge to see which side is reflective; wipe a small section of foil with a white cloth to check for dust; and feel the temperature at the closest and furthest registers to rule out duct leakage. Those four checks will tell you roughly what’s wrong before anyone gets in the attic. Then call (844) 978-0556 for a free estimate and an honest read on what’s actually worth fixing.
The Bottom Line
Radiant barrier problems are almost always installation problems, not product problems. Check the air gap before anything else. Confirm the foil is oriented correctly. Diagnose dust with a flashlight and a white cloth before assuming replacement. Rule out duct leakage early, because it costs less to fix and can mask any barrier improvement. Fix ventilation alongside the barrier or don’t fix either. And when the barrier is under 70% intact, replacement is the honest call. If you’re in Paradise and the diagnosis is stalling out, call us – we’ll give you a straight answer and a free estimate. The right insulation partner should be one you can call back, and that’s who we are.
Written by the team at Walt’s Insulation Paradise.