
Last updated November 18, 2026
Spray Foam Insulation Maintenance Schedule: What to Do and When
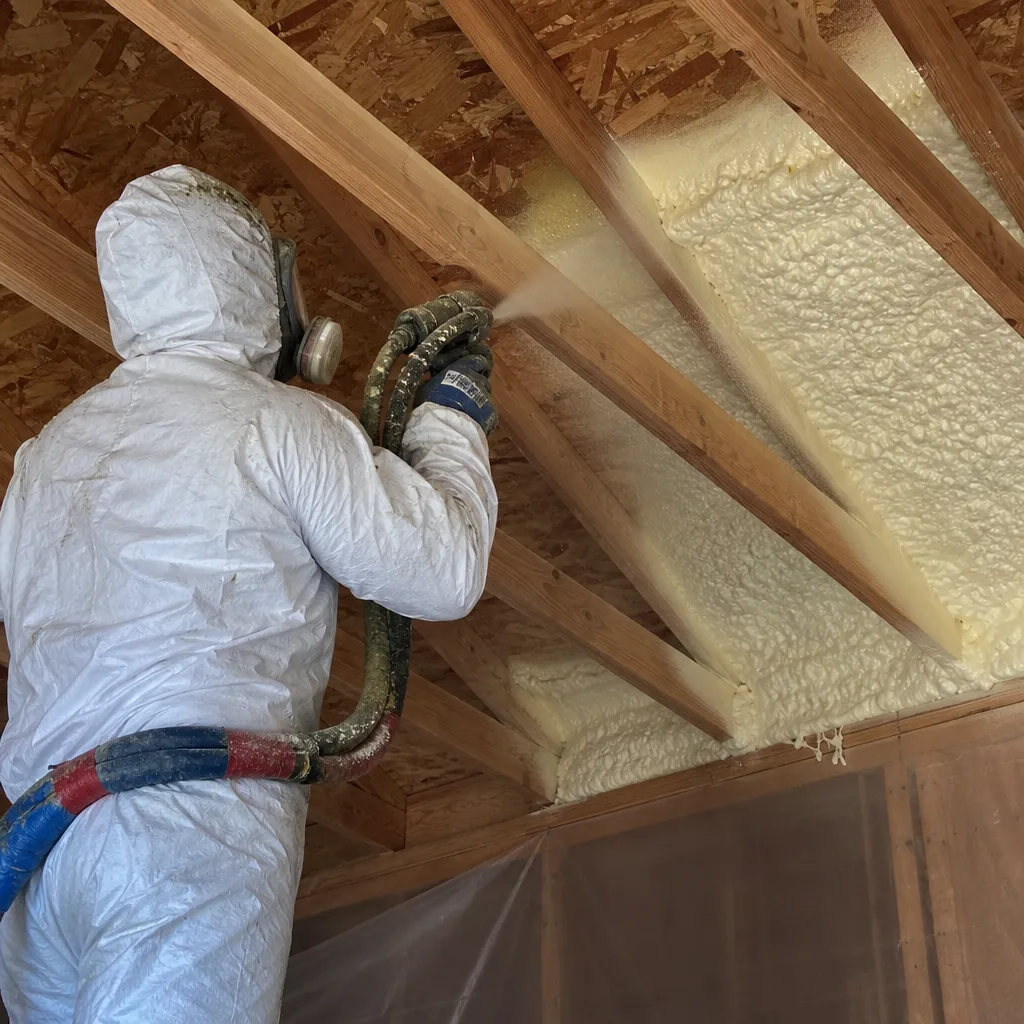
The only thing worse than insulation that fails is insulation that hides a failure. Closed-cell spray foam is exceptionally good at concealing what’s happening behind it, which is exactly why it needs a schedule. It’s sold as “lifetime insulation,” and for the foam itself, that’s mostly true. What isn’t lifetime is everything the foam touches: the roof deck above it, the pipes running through it, the seals at every penetration, and the UV-exposed surfaces that sun hits directly. Ignore those adjacent systems and a 25-year foam job can turn into a 10-year water damage claim. This guide lays out a real maintenance schedule for foam-insulated homes in Paradise, NV and the surrounding desert climate, including what to check after a summer that hit 115°F.
Quick Answer
Inspect spray foam insulation once a year and after any extreme heat event, checking the foam surface for oxidation, the seals at pipes, wires, and vents for gaps, and the roof deck and framing behind the foam for moisture or staining. Recoat any foam exposed to sunlight with a thermal barrier coating every 3 to 5 years, and document the install with photos at completion. In a climate like Paradise, where summer temperatures routinely top 110°F, annual inspection matters more than the “look at it every few years” advice you’ll find in cooler parts of the country.
Table of Contents
- The Annual Spray Foam Inspection Checklist
- What to Look for After a 115°F Summer
- Checking Foam at Penetration Points
- UV Degradation and Thermal Barrier Coatings
- What a Healthy Foam Install Looks Like at Years 1, 5, and 15
- Documenting Your Installation at Job Completion
- Common Mistakes to Avoid
- Frequently Asked Questions
The Annual Spray Foam Inspection Checklist
Once a year, walk your attic and any exposed crawl space or rim joist areas where foam was applied. In Paradise, we recommend doing this in the late spring, before the worst heat arrives, so you catch problems while the weather still lets you fix them comfortably. Here’s the checklist we walk homeowners through when we’re called out to Paradise homes for a foam inspection:
- Look at the foam surface itself. Healthy closed-cell foam is a consistent color, firm to the touch, and doesn’t crumble. Any chalky, powdery, or dark-spotted surface means UV exposure or chemical breakdown.
- Run your eyes along every penetration. Pipes, electrical conduit, recessed lights, vent stacks, and wiring all pass through the foam. Look for cracks, gaps, or foam pulling away from the pipe.
- Check the roof deck above the foam. Staining, water rings, or soft spots mean moisture is getting in behind the foam.
- Inspect the foam-framing bond. Push gently on the foam where it meets studs or rafters. It should be tight. If it flexes or separates, it’s not sealing anymore.
- Check for pests. Rodent droppings, chewed foam edges, or nesting material mean something has gotten in through a gap you missed.
- Sniff for musty odors. A musty attic points to a slow leak the foam is hiding, which is exactly the failure mode we’re trying to prevent.
- Look at any foam exposed to sunlight (roof sheathing in unfinished spaces, rim joists on older homes). Oxidation shows as a dull, chalky surface.
If you find a problem, don’t seal it yourself. Foam repairs need to be matched to the original material and layered correctly. That’s when it makes sense to call a spray foam insulation crew in Paradise for an inspection.
What to Look for After a 115°F Summer
Paradise summers push materials harder than most of the country. When a summer tops 115°F, thermal expansion and contraction in the framing, plumbing, and electrical systems moves everything the foam is bonded to. Foam is flexible, but it isn’t infinitely flexible. Over a decade of 100-degree temperature swings, the foam at penetration points tends to crack or pull away, and the roof decking above it tends to move just enough to open hairline separations. This is the single biggest source of failures we see in Paradise foam installs.
After an especially hot summer, add these checks to your annual inspection:
- Check for new gaps at penetrations. Any pipe or wire that now has a visible gap where foam used to be snug is an air leak waiting to become a moisture problem.
- Look for cracking along framing lines. Foam often cracks where it meets a stud or rafter because the wood moved at a different rate than the foam.
- Feel for soft or dished areas. Foam that has softened or sagged indicates heat damage.
- Inspect the roof from the underside. Staining, rust streaks on nails, or daylight through the sheathing means the foam’s bond to a roofing component has separated.
- Check combustion appliances. If your attic has a furnace or water heater, verify the foam hasn’t been applied over a vent that needs airflow. This is not a homeowner check. Call a pro.
A tune-up of your attic insulation in Paradise after a bad summer is money well spent if you spot any of these warning signs.
Checking Foam at Penetration Points
Every pipe, wire, vent stack, duct, and light fixture that passes through spray foam is a weak point over time. When we install foam, we seal tight around these, but the thermal expansion of a copper pipe in a Paradise attic is measured in millimeters, and over a decade those millimeters matter. The foam will typically pull away from the pipe by a hairline gap. That’s the gap the drywall you can’t see doesn’t hide.
Here’s what we check at penetrations:
- Visual check. Use a flashlight and look for any visible crack or gap where foam meets pipe, wire, or conduit. Run your finger along the seam. If you feel a step down, foam has separated.
- Air movement check. On a windy day, feel for air movement at penetration points. Even a tiny draft means outside air is getting in, which also means conditioned air is escaping.
- Condensation check. On a cool morning, run your hand along the pipe. Beads of water mean the seal has failed and warm, humid air is hitting a cold surface.
- Foam-to-fixture check. Recessed can lights, bath fan housings, and smoke detectors all have to be separated from foam. Any foam touching them is a repair, not a feature. Call a pro.
- Rim joist penetrations. If your crawl space was encapsulated, check where pipes and wires pass through the rim joist. This is the most common leak point in Paradise homes.
For seal failures at penetration points, a crawl space encapsulation and vapor barrier service in Paradise can restore the air seal, and the foam penetrations can be re-sealed with matching material.
UV Degradation and Thermal Barrier Coatings
Spray foam does not tolerate direct sunlight. UV exposure degrades both closed-cell and open-cell foam, and the timeline is faster than most homeowners expect. Exposed foam starts showing surface oxidation in as little as a few months, and within a year or two the surface goes chalky and then starts to powder and crumble. Once the surface is compromised, the foam structure below is exposed and the whole layer starts losing performance.
Anywhere foam is not covered by drywall, ceiling, or a thermal barrier coating, it needs to be inspected and recoated. In practice, that means attics with exposed foam on roof sheathing, rim joists in garages, and exterior wall sections that have exposed foam. In Paradise, where UV index runs extreme most of the year, we recommend a thermal barrier coating check every 3 years and a recoat whenever the surface shows chalkiness.
What a thermal barrier coating does:
- Blocks UV so the foam surface doesn’t oxidize
- Provides fire resistance (intumescent coatings are required by most building codes for exposed foam in occupied spaces)
- Protects the foam from mechanical damage
- Gives you a surface you can actually inspect: a healthy coating looks uniform, and a failing one shows peeling, bubbling, or chalking
If you’re not sure whether your foam has a thermal barrier, that’s the first question to ask a pro. Walt’s Insulation Paradise home handles thermal barrier inspections and recoats on the same schedule as the rest of our foam work.
What a Healthy Foam Install Looks Like at Years 1, 5, and 15
You can’t tell what “wrong” looks like if you never saw “right.” That’s why we walk every homeowner through their install the day we finish, and why we encourage a photo walkthrough each year. Here’s what a healthy closed-cell foam installation looks like at three checkpoints.
Year 1
- Color: Consistent from joint to joint. Pale yellow or off-white for most brands; no dark patches.
- Texture: Firm but yielding to a fingernail. Not crumbly, not sticky.
- Coverage: No visible wood, no thin patches, no overspray on fixtures that should be clear.
- Bond: Sound. When you push, you should feel the framing move behind the foam.
Year 5
- Color: Slightly darker from dust but uniform. Any yellowing at the surface means there was a UV exposure the coating missed.
- Texture: Still firm. Some minor surface cracking along framing lines is normal; deep cracking is not.
- Penetrations: Still tight. Any hairline gaps at pipes or wires indicate it’s time to re-seal.
- Coatings: Still intact where originally applied. First recoat is typically due around this point.
Year 15
- Color: Visible dust accumulation is normal, but the surface should still be uniform.
- Texture: Firm. Chalky surfaces on UV-exposed areas mean recoat is overdue.
- Penetrations: Expect a few to need re-sealing after 15 summers in Paradise. This is normal and cheap to fix when you catch it early.
- Roof deck: Should be dry and clean. Staining means there’s a roof issue the foam is hiding, and that’s a roofer call, not an insulation one.
Documenting Your Installation at Job Completion
Here’s the habit that saves real money: photograph your foam installation before, during, and after the job, and store it somewhere you’ll find it in five years. When you sell the home, a buyer is more likely to trust a documented install than an unknown one. When you file an insurance claim for water damage, your insurance adjuster will want to know what the inside of the wall or attic looked like before the loss. And when you need a future repair, the original photos tell your foam contractor exactly what material was used and how it was applied. We take a photo set on every install, and we recommend homeowners do the same.
Here’s the documentation set we recommend:
- Pre-install photos. Attic wide shots, close-ups of penetrations, and any existing insulation or damage.
- Material labels. Photo of the foam drum or kit label showing brand (Owens Corning, Johns Manville, Icynene, etc.) and batch.
- In-progress photos. Coverage shots at each stage so you can see what’s under the final layer.
- Post-install photos. Same angles as the pre-install shots, so future you can compare.
- Penetration close-ups. One photo of each pipe, wire, and vent where foam was applied.
- Coating photos. If a thermal barrier was applied, shoot the coating on the day it was applied and note the product.
- Date and location. File these in the same folder as your permit and receipt.
Store a copy in your cloud drive. Paperwork in an attic filing box is a photo set that will disappear with the attic.
Common Mistakes to Avoid
- Skipping the annual check because the foam “looks fine.” The failures that matter are hidden behind the surface, not visible from three feet away. You have to actually run a hand along the penetrations.
- Ignoring hairline gaps at penetrations. A 1/8-inch gap at a pipe penetration in a Paradise attic is a 25-year air leak. It’s also the entry point for moisture. Fix it the year you find it.
- Skipping the thermal barrier recoat. Exposed foam without a coating loses performance faster in the desert sun than anywhere else in the country. Get it recoated when the surface goes chalky.
- Assuming the foam is also an air seal forever. Foam is an air seal, but only where it’s still bonded. Thermal expansion in Paradise summers moves the framing every year, and the bond can crack over time.
- Not photographing the install. If you ever file a claim, sell the home, or need a repair, you’ll wish you had photos. This is the cheapest maintenance task on the list.
- Confusing a roof leak with an insulation problem. Staining at the roof deck is a roofer first, then insulation. Diagnosing it wrong means spending money on the wrong fix.
- Trusting your foam install to a crew with no published address. When something goes wrong six years later, the company with a published address and license number takes your call and the one with a burner number doesn’t. That’s the whole point of going with a locally operated company in Paradise.
When to Call a Professional
Call a pro when you find moisture, staining, or a soft spot on any framing surface behind the foam; when a thermal barrier coating is chalking, cracking, or missing; when you can’t identify the foam material or coating that was used; when you’re buying a home with an unknown foam history; or when a repair involves more than a small touch-up. Different foams require different prep and matching. A repair crew that doesn’t know what’s already there can make the problem worse. Walt’s Insulation Paradise offers free estimates in Paradise. Call (844) 978-0556 and we’ll walk you through what we see. We answer the phone live, 24/7. Our technicians have up to 26 years of experience, all our work is backed by the Done Right Promise, and we carry industry-trusted brands including GreenFiber, Owens Corning, and Knauf to match any existing install.
Frequently Asked Questions
Once a year, plus an extra check after any summer that tops 110°F. In Paradise, that means annual inspections in the spring and a targeted check after the worst heat wave of the year. Skipping a year is survivable. Skipping three years is how small foam gaps turn into moisture problems you can’t see until they’re expensive.
The foam material itself does, meaning it doesn’t rot or settle the way fiberglass does. What doesn’t last forever is the seal at every penetration, the thermal barrier coating on UV-exposed foam, and the underlying roof and framing the foam is bonded to. Those are the systems that need a schedule, and they’re the reason annual inspection matters.
Chalky or yellow surface foam means UV degradation. Sunlight breaks down the foam surface over time, and in Paradise the sun does it faster than almost anywhere in the country. Recoat with a thermal barrier coating to stop further breakdown. If the foam has already started to powder or crumble, the degraded layer needs to be removed and re-coated.
Yes, for the surface checks: color, texture, gaps, and staining. You can run a hand along penetrations, look for chalkiness, and snap photos. What you shouldn’t do yourself is repair foam, recoat thermal barriers, or diagnose moisture behind the foam. Those need the same matched material and the same trained crew that installed it.
Hairline separation at pipe and wire penetrations after our 100-degree-plus summers. Second most common is UV-exposed foam without a thermal barrier coating. Both are cheap to fix on an annual schedule and expensive to fix after a few years of moisture intrusion.
Most insurers will ask what type of insulation is in the attic and whether a thermal barrier is present, and a well-documented installation makes the answer easy. Photos from install day and an annual inspection log are the two things an adjuster asks for. Walt’s Insulation Paradise photographs every job for this reason, and we recommend homeowners keep their own copy. Call (844) 978-0556 for a free estimate on an inspection or recoat.
The Bottom Line
Spray foam is a genuine lifetime material, but the systems it touches aren’t on the same clock. Annual inspection of the foam, its penetrations, its coating, and the framing behind it is what protects the twenty-five year investment. In Paradise, the thermal expansion cycle is harsher than most of the country, so spring inspection plus a post-summer check is the schedule that actually works. Document the install at completion, keep the photos, and don’t let a hairline gap at a pipe penetration turn into a hidden leak. If anything on that list looks off, get an inspection. Call Walt’s Insulation Paradise at (844) 978-0556 for a free estimate; we answer the phone live, 24/7.
Written by the team at Walt’s Insulation Paradise.